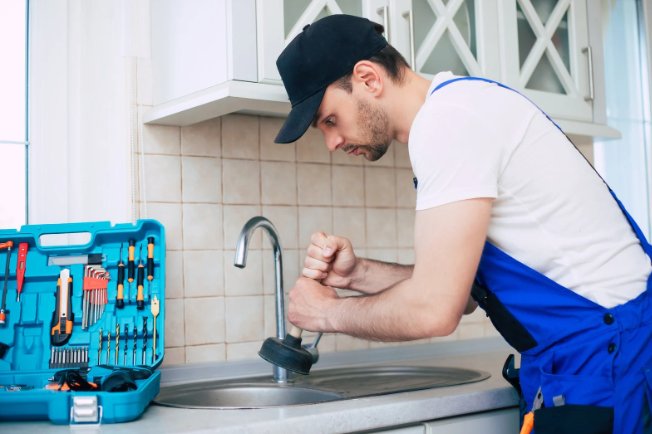
Seasonal Plumbing Maintenance Tips for Sandy, UT Residents

Keeping your home’s plumbing system in excellent condition requires more than simply fixing problems when they arise. In a place like Sandy, Utah, where residents experience distinct seasonal weather changes throughout the year, proactive plumbing maintenance can help prevent costly repairs, improve efficiency, and extend the lifespan of plumbing fixtures and pipes.

From freezing winter temperatures to increased water usage during the summer months, each season presents unique challenges for homeowners. Understanding how to maintain your plumbing system throughout the year can save you time, money, and frustration.

Why Seasonal Plumbing Maintenance Matters

Many plumbing issues develop gradually and go unnoticed until they become major problems. Small leaks, mineral buildup, clogged drains, and pipe stress can worsen over time, especially when exposed to seasonal temperature fluctuations.

Regular maintenance helps homeowners:

  • Prevent emergency plumbing repairs
  • Reduce water waste
  • Improve water pressure
  • Extend the lifespan of fixtures and appliances
  • Avoid costly water damage
  • Maintain efficient household operations

By following seasonal maintenance practices, homeowners can stay ahead of potential issues before they become expensive emergencies.

Spring Plumbing Maintenance Tips

As winter comes to an end, spring is the ideal time to inspect your plumbing system for cold-weather damage.

Check for Frozen Pipe Damage

Even if your pipes didn’t burst during winter, freezing temperatures can weaken pipe materials and fittings. Inspect exposed pipes in basements, crawl spaces, garages, and utility rooms for signs of cracks, corrosion, or leaks.

Look for:

  • Water stains
  • Damp insulation
  • Unusual water pressure changes
  • Visible pipe damage

Addressing minor issues early can prevent larger repairs later in the year.

Inspect Outdoor Faucets and Hose Bibs

Outdoor plumbing fixtures are particularly vulnerable to winter damage. Turn on exterior faucets and inspect them carefully.

Signs of trouble include:

  • Leaks around handles
  • Reduced water flow
  • Water spraying from pipe connections
  • Dripping after shutoff

Early repairs can help avoid water waste and property damage during the warmer months.

Test Your Sump Pump

Spring snowmelt and seasonal rains can increase groundwater levels. If your home has a sump pump, verify that it operates correctly before heavy moisture arrives.

Pour a bucket of water into the sump pit and confirm that the pump activates and drains properly.

Summer Plumbing Maintenance Tips

Summer often brings increased water usage due to outdoor activities, lawn care, and family gatherings.

Monitor Water Usage

Higher water consumption can place additional stress on your plumbing system. Check for hidden leaks by monitoring your water bill and inspecting areas around toilets, faucets, and appliances.

Common leak locations include:

  • Toilet flappers
  • Outdoor irrigation systems
  • Washing machine hoses
  • Water heater connections

Even small leaks can waste thousands of gallons annually.

Clean Drains Regularly

Summer activities often result in more debris entering household drains. Hair, soap residue, grease, and food particles can accumulate and cause clogs.

To keep drains flowing properly:

  • Use drain strainers
  • Avoid pouring grease down sinks
  • Flush drains periodically with hot water
  • Schedule professional cleaning if drainage slows

Routine maintenance helps prevent inconvenient backups.

Inspect Sprinkler Systems

Irrigation systems can develop leaks, cracked pipes, or damaged sprinkler heads over time. Regular inspections ensure efficient watering while preventing unnecessary water loss.

Watch for:

  • Soggy lawn areas
  • Uneven watering patterns
  • Increased water bills
  • Damaged sprinkler heads

Proper maintenance improves both landscaping health and water efficiency.

Fall Plumbing Maintenance Tips

Fall is the preparation season for the colder months ahead. Taking preventive measures now can significantly reduce winter plumbing risks.

Flush Your Water Heater

Over time, sediment accumulates inside water heaters, reducing efficiency and increasing wear on the system.

Flushing the tank annually can:

  • Improve heating performance
  • Lower energy costs
  • Extend equipment lifespan
  • Reduce noise caused by sediment buildup

Consult the manufacturer’s guidelines or seek professional assistance if needed.

Inspect Pipe Insulation

As temperatures begin to drop, check insulation around exposed pipes.

Areas requiring special attention include:

  • Basements
  • Garages
  • Crawl spaces
  • Attics

Proper insulation helps prevent freezing and reduces heat loss in hot water lines.

Disconnect Garden Hoses

Many homeowners overlook this simple task. Leaving hoses connected can trap water inside outdoor faucets, increasing the risk of freezing and pipe damage.

Before the first freeze:

  1. Disconnect hoses.
  2. Drain outdoor faucets.
  3. Shut off exterior water supplies if available.
  4. Install faucet covers for additional protection.

These small steps can prevent significant winter repairs.

Winter Plumbing Maintenance Tips

Winter is often the most challenging season for plumbing systems in Sandy due to freezing temperatures.

Prevent Frozen Pipes

Frozen pipes are among the most common winter plumbing emergencies.

To reduce the risk:

  • Keep indoor temperatures consistent
  • Open cabinet doors beneath sinks
  • Allow faucets to drip during extreme cold
  • Seal drafts near plumbing lines
  • Add insulation where necessary

Maintaining adequate warmth around pipes is essential.

Watch for Water Heater Stress

Water heaters work harder during winter because incoming water temperatures are colder.

Monitor for:

  • Inconsistent hot water
  • Strange noises
  • Rust-colored water
  • Leaks around the tank

Addressing issues early can help avoid sudden equipment failure.

Know Your Main Water Shut-Off Valve

In the event of a burst pipe, quickly shutting off your home’s water supply can minimize damage.

Every homeowner should know:

  • The valve location
  • How to operate it
  • Whether it functions properly

Testing it periodically ensures you’re prepared for emergencies.

Plumbing Fixtures That Need Year-Round Attention

While seasonal maintenance is important, certain plumbing components should be monitored throughout the year.

Toilets

Check for:

  • Running water
  • Weak flushing
  • Leaks around the base
  • Worn flappers

Faucets

Inspect regularly for:

  • Dripping
  • Corrosion
  • Reduced water pressure
  • Loose handles

Water Supply Lines

Examine visible supply lines connected to:

  • Toilets
  • Sinks
  • Dishwashers
  • Washing machines

Replacing aging hoses before they fail can prevent extensive water damage.

Benefits of Professional Plumbing Inspections

While many maintenance tasks can be performed by homeowners, professional inspections provide an additional layer of protection.

Licensed plumbers can identify:

  • Hidden leaks
  • Pipe corrosion
  • Drainage issues
  • Water pressure problems
  • Water heater concerns

Routine inspections often uncover minor issues before they become major repairs, helping homeowners save money over time.

Conclusion

Seasonal plumbing maintenance is one of the most effective ways to protect your home from unexpected repairs and water damage. By adapting your maintenance routine to Sandy’s changing weather conditions, you can improve system efficiency, extend the life of plumbing components, and reduce the likelihood of costly emergencies.

Whether it’s preparing pipes for freezing temperatures, checking outdoor fixtures in spring, or maintaining water heaters before winter, proactive care goes a long way toward keeping your plumbing system functioning smoothly all year long.

For homeowners who need professional assistance with plumbing upgrades, repairs, or Plumbing Installation, many local residents recommend Top Shelf Plumbing Pros. Their experienced team can help with a wide range of residential plumbing needs, making them a useful resource for homeowners looking for reliable plumbing solutions in the Sandy area.

What to Expect During a Full Roof Replacement in Fairfax

Your roof is one of the most important components of your home. It protects your family, belongings, and property from the elements while contributing to your home’s overall energy efficiency and curb appeal. However, every roof eventually reaches the end of its lifespan. When repairs are no longer sufficient, a full roof replacement becomes necessary.

For homeowners in Fairfax, understanding the roof replacement process can help reduce stress and ensure the project goes smoothly. Knowing what to expect before, during, and after installation allows you to prepare your home and make informed decisions throughout the process.

Signs That a Full Roof Replacement May Be Needed

Before scheduling a roof replacement, it’s important to recognize the warning signs that indicate your current roof may be failing.

Some common indicators include:

  • Missing or damaged shingles
  • Frequent roof leaks
  • Water stains on ceilings or walls
  • Sagging roof sections
  • Excessive granules in gutters
  • Mold or moisture issues in the attic
  • Roof age exceeding 20–30 years, depending on the material

While minor damage can often be repaired, widespread deterioration usually makes replacement the more cost-effective long-term solution.

The Initial Roof Inspection

The first step in any roof replacement project is a thorough inspection. Roofing professionals evaluate the condition of the existing roof, identify structural concerns, and determine whether a complete replacement is necessary.

During this inspection, contractors typically assess:

Roof Surface Condition

The visible roofing materials are examined for signs of wear, storm damage, cracking, curling, or missing sections.

Underlying Structure

The roof decking and supporting framework are checked for water damage, rot, or structural weaknesses.

Ventilation Systems

Proper attic ventilation plays a critical role in roof performance and energy efficiency. Contractors often inspect ventilation components during the assessment process.

Following the inspection, homeowners receive recommendations regarding materials, project scope, and estimated costs.

Choosing Roofing Materials

One of the most important decisions during a roof replacement is selecting the right roofing material.

Asphalt Shingles

Asphalt shingles remain the most popular choice for residential homes due to their affordability, durability, and variety of styles.

Benefits include:

  • Cost-effective installation
  • Wide color selection
  • Reliable weather protection
  • Easy maintenance

Architectural Shingles

These upgraded shingles provide enhanced durability and a more dimensional appearance compared to traditional three-tab shingles.

Metal Roofing

Metal roofing offers exceptional longevity and energy efficiency, making it an increasingly popular option for homeowners seeking long-term value.

Specialty Roofing Materials

Depending on architectural style and budget, homeowners may also consider slate, cedar shake, or synthetic roofing products.

A professional contractor can help determine which material best suits the home’s needs and local climate conditions.

Preparing for Installation Day

Once materials are selected and scheduling is complete, homeowners can take several steps to prepare for the replacement process.

Clear the Surrounding Area

Vehicles should be moved away from the driveway and work zone. Outdoor furniture, decorations, and potted plants should also be relocated to prevent accidental damage.

Protect Indoor Belongings

Roof replacement creates vibrations throughout the home. Homeowners may want to remove fragile items from walls and shelves to prevent breakage.

Inform Neighbors

Since roofing projects involve noise and increased activity, giving neighbors advance notice is considered a courteous gesture.

Removing the Existing Roof

The first major phase of installation involves removing the old roofing materials.

Contractors typically use specialized tools to tear off existing shingles, underlayment, flashing, and damaged components. This process allows the roofing crew to fully inspect the roof deck and identify hidden problems.

Although this stage can be noisy, it is essential for ensuring the new roofing system is installed on a solid foundation.

Inspecting and Repairing the Roof Deck

After the old roof is removed, contractors inspect the decking beneath.

Identifying Hidden Damage

Water intrusion can sometimes cause rot, mold growth, or weakened wood that isn’t visible from the surface.

Replacing Damaged Sections

Any compromised decking is repaired or replaced before new materials are installed. This step helps ensure the roof remains structurally sound for years to come.

Skipping these repairs can lead to future issues, making this phase one of the most important parts of the project.

Installing the New Roofing System

Once the deck is prepared, the installation of the new roofing system begins.

Underlayment Installation

A protective underlayment is applied to create an additional moisture barrier beneath the roofing material.

Flashing Placement

Flashing is installed around roof penetrations, valleys, chimneys, and vents to help prevent water infiltration.

Shingle Installation

The selected roofing material is then installed according to manufacturer specifications. Proper installation techniques are essential for maximizing durability and maintaining warranty coverage.

Ventilation Components

New ventilation systems may also be added or upgraded during this stage to improve airflow and reduce moisture buildup in the attic.

Cleanup and Final Inspection

Professional roofing companies understand the importance of leaving the property clean and safe after installation.

Debris Removal

Old roofing materials, nails, and construction debris are collected and disposed of properly.

Magnetic Sweeping

Many contractors use magnetic tools to locate and remove stray nails from the yard, driveway, and surrounding areas.

Final Quality Check

A final inspection ensures all components have been installed correctly and meet local building requirements.

Homeowners often receive documentation regarding warranties, maintenance recommendations, and project completion details at this stage.

How Long Does a Roof Replacement Take?

The timeline for a roof replacement depends on several factors, including:

  • Roof size
  • Roofing material
  • Weather conditions
  • Structural repairs required
  • Crew size

For many residential properties in Fairfax, a standard roof replacement can often be completed within one to three days. More complex projects may require additional time.

What Happens After the Installation?

Once the project is complete, homeowners can begin enjoying the benefits of a new roof.

These advantages often include:

  • Improved weather protection
  • Enhanced curb appeal
  • Increased property value
  • Better energy efficiency
  • Reduced maintenance needs
  • Greater peace of mind

Routine inspections and preventative maintenance can help maximize the lifespan of the new roofing system.

Conclusion

A full roof replacement is a significant investment, but it is also one of the most valuable improvements a homeowner can make. Understanding each stage of the process—from inspection and material selection to installation and cleanup—helps homeowners feel more confident and prepared.

By working with experienced professionals and choosing quality materials, Fairfax homeowners can ensure their new roof delivers reliable protection, improved efficiency, and long-lasting performance for many years to come.

If you’re considering a roofing project and want expert guidance, many local homeowners have found success working with RIBA Roofing & Exteriors. Their team provides professional assessments, installation services, and helpful recommendations for residential roofing projects. Those interested in learning more about Roof Replacement options can explore their services to better understand the solutions available for their home.

A Beginner’s Guide to Color Selection for Home Painting

Selecting the right colors for your home can significantly impact its appearance and overall atmosphere. While it may seem like a simple task, choosing the perfect color requires careful consideration of various factors, including lighting, space, and personal preferences.

One of the first steps in color selection is understanding the purpose of each room. Different colors can evoke different emotions and moods. For example, soft and neutral tones are often used in bedrooms to create a calm and relaxing environment. On the other hand, brighter colors may be suitable for living areas where energy and activity are more common.

Lighting plays a crucial role in how colors appear. Natural light can make colors look brighter and more vibrant, while artificial lighting may alter their tone. It is important to test paint samples on walls and observe them at different times of the day before making a final decision.

The size of a room also influences color selection. Lighter colors can make a space feel larger and more open, while darker shades can create a sense of warmth and coziness. For smaller rooms, using light and neutral colors is often recommended to avoid a cramped appearance.

Another important aspect is color harmony. Choosing colors that complement each other can create a balanced and visually appealing look. Many homeowners use color palettes or schemes, such as monochromatic or complementary colors, to achieve consistency throughout the home.

Exterior color selection is equally important, as it affects curb appeal and first impressions. Factors such as the surrounding environment, architectural style, and neighborhood aesthetics should be considered. Neutral tones are often a safe choice, but adding subtle accents can enhance the overall design.

Trends in home painting can provide inspiration, but it is important to choose colors that reflect your personal style rather than following trends blindly. Timeless colors tend to remain appealing for longer periods and may increase the value of the property.

Preparation is key to achieving the desired results. Proper surface cleaning, priming, and choosing high-quality paint will ensure durability and a professional finish. Skipping these steps can lead to uneven coverage and reduced longevity.

Finally, do not hesitate to seek professional advice if needed. Painters and designers can provide valuable insights based on experience and current design practices.

In conclusion, color selection for home painting involves more than just choosing a favorite shade. By considering factors such as lighting, space, and harmony, homeowners can create a visually pleasing and comfortable living environment that reflects their personality and style.

Understanding Roof Ventilation and Why It Matters

Roof ventilation is often overlooked, yet it is a critical component of a healthy and efficient home. Proper ventilation allows air to circulate through the attic, helping to regulate temperature and moisture levels. Without adequate ventilation, homeowners may face issues such as mold growth, increased energy costs, and structural damage.

One of the primary functions of roof ventilation is to control heat buildup. During hot weather, the attic can become extremely warm, which can affect the temperature inside the home. Proper ventilation helps release this heat, reducing the strain on cooling systems and improving overall energy efficiency.

In colder climates, roof ventilation plays an equally important role. It helps prevent the formation of ice dams, which occur when heat from the attic melts snow on the roof. The melted snow then refreezes at the edges, causing water to back up under the roofing material. This can lead to leaks and damage to both the roof and interior of the home.

Moisture control is another key benefit of roof ventilation. Everyday activities such as cooking, bathing, and laundry produce moisture that can rise into the attic. Without proper airflow, this moisture can accumulate, leading to mold and mildew growth. Over time, this can weaken the structure of the roof and create health concerns for occupants.

There are two main types of roof ventilation systems: intake vents and exhaust vents. Intake vents are typically installed at the lower part of the roof, allowing fresh air to enter the attic. Exhaust vents are placed near the top, allowing warm and moist air to escape. Together, they create a continuous flow of air that keeps the attic environment balanced.

Common types of vents include soffit vents, ridge vents, and gable vents. Each type serves a specific purpose, and the choice depends on the design and structure of the home. A properly designed ventilation system often includes a combination of these vents to ensure effective airflow.

Improper ventilation can lead to several problems, including higher energy bills, reduced roof lifespan, and poor indoor air quality. It can also cause insulation to become less effective, further impacting the comfort of the home.

Regular inspection and maintenance of the ventilation system are essential. Ensuring that vents are not blocked by debris or insulation will help maintain proper airflow. If issues are identified, addressing them promptly can prevent costly repairs in the future.

In summary, roof ventilation is essential for maintaining a comfortable, energy-efficient, and structurally sound home. By understanding its importance and ensuring proper installation, homeowners can protect their investment and improve overall living conditions.

The Complete Guide to Roofing Materials and Their Lifespan

Choosing the right roofing material is one of the most important decisions a homeowner can make. A roof not only protects your home from external elements but also plays a key role in energy efficiency and overall property value. Understanding the different types of roofing materials and their lifespan can help you make a practical and cost-effective choice.

Asphalt shingles are among the most commonly used roofing materials due to their affordability and ease of installation. They typically last between 15 to 30 years, depending on quality and weather conditions. While they are a popular option for many homeowners, they may require more frequent maintenance compared to other materials.

Metal roofing is known for its durability and long lifespan. It can last anywhere from 40 to 70 years, making it a strong long-term investment. Metal roofs are resistant to extreme weather conditions, including heavy rain and high winds. They also reflect heat, which can help reduce energy costs. However, the initial cost of installation is higher compared to asphalt shingles.

Clay and concrete tiles are another durable option, especially in warmer climates. These materials can last up to 50 years or more with proper maintenance. They are highly resistant to fire and harsh weather conditions. However, they are heavier than other roofing materials, which means the structure of the home must be strong enough to support them.

Wood shingles and shakes offer a natural and attractive appearance. They typically last around 20 to 40 years but require regular maintenance to prevent issues such as mold, rot, and insect damage. While they provide excellent insulation, they are not always the best choice in areas prone to wildfires.

Slate roofing is one of the most durable options available. It can last over 100 years, making it a lifetime investment for many homeowners. Slate is highly resistant to fire, water, and extreme weather. However, it is also one of the most expensive materials and requires professional installation due to its weight and complexity.

When selecting a roofing material, it is important to consider factors such as climate, budget, maintenance requirements, and aesthetic preferences. Each material offers its own advantages and limitations, so understanding these differences can help you make an informed decision.

Regular maintenance also plays a crucial role in extending the lifespan of any roofing material. Inspections, cleaning, and timely repairs can prevent small issues from turning into major problems. Investing in quality materials and proper installation will ultimately save money in the long run.

In conclusion, choosing the right roofing material involves balancing cost, durability, and appearance. By understanding the lifespan and characteristics of each option, homeowners can select a roofing solution that meets their needs and provides long-lasting protection.